Bi-Annual Evaluation
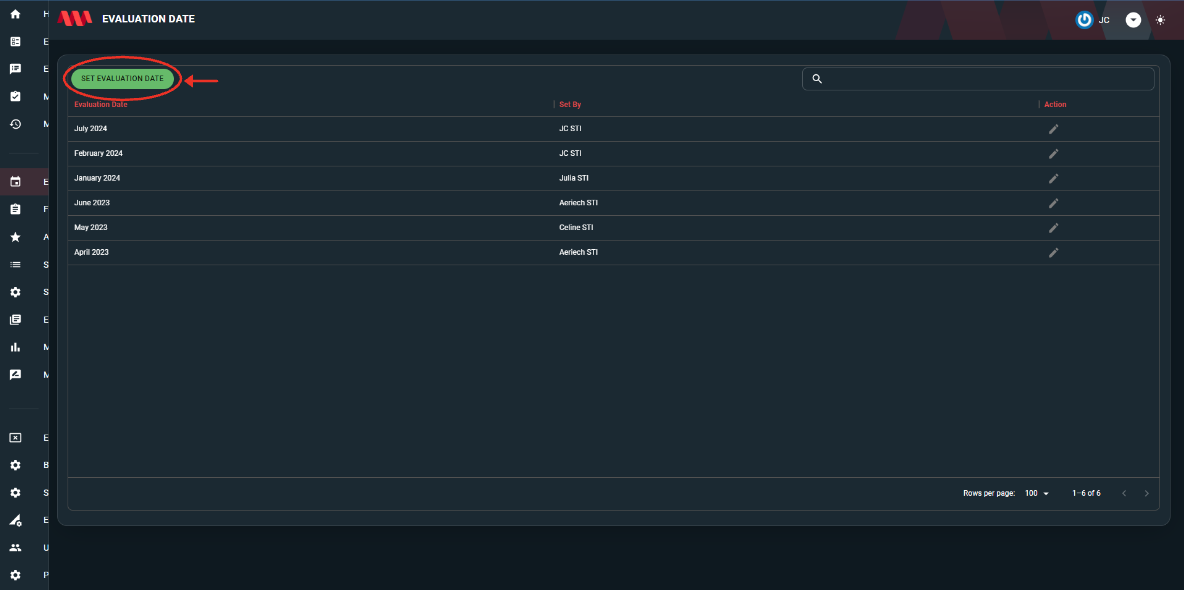
Evaluation Date
- The Set Evaluation Date button is to choose and schedule a specific date for the evaluation. Please see the image below.
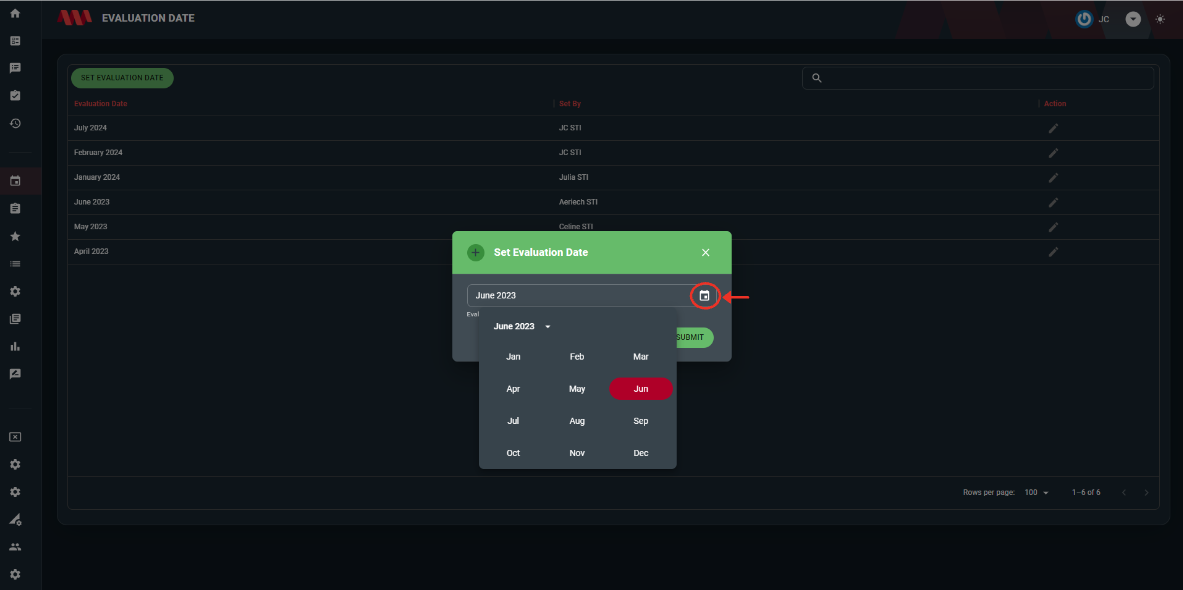
- After clicking the button, a dialog box will appear, displaying a calendar icon on the right side. Click on this calendar icon to choose a specific date from the calendar. This feature used to easily select and set a desired date for the evaluation. Please see the image below.


Forms
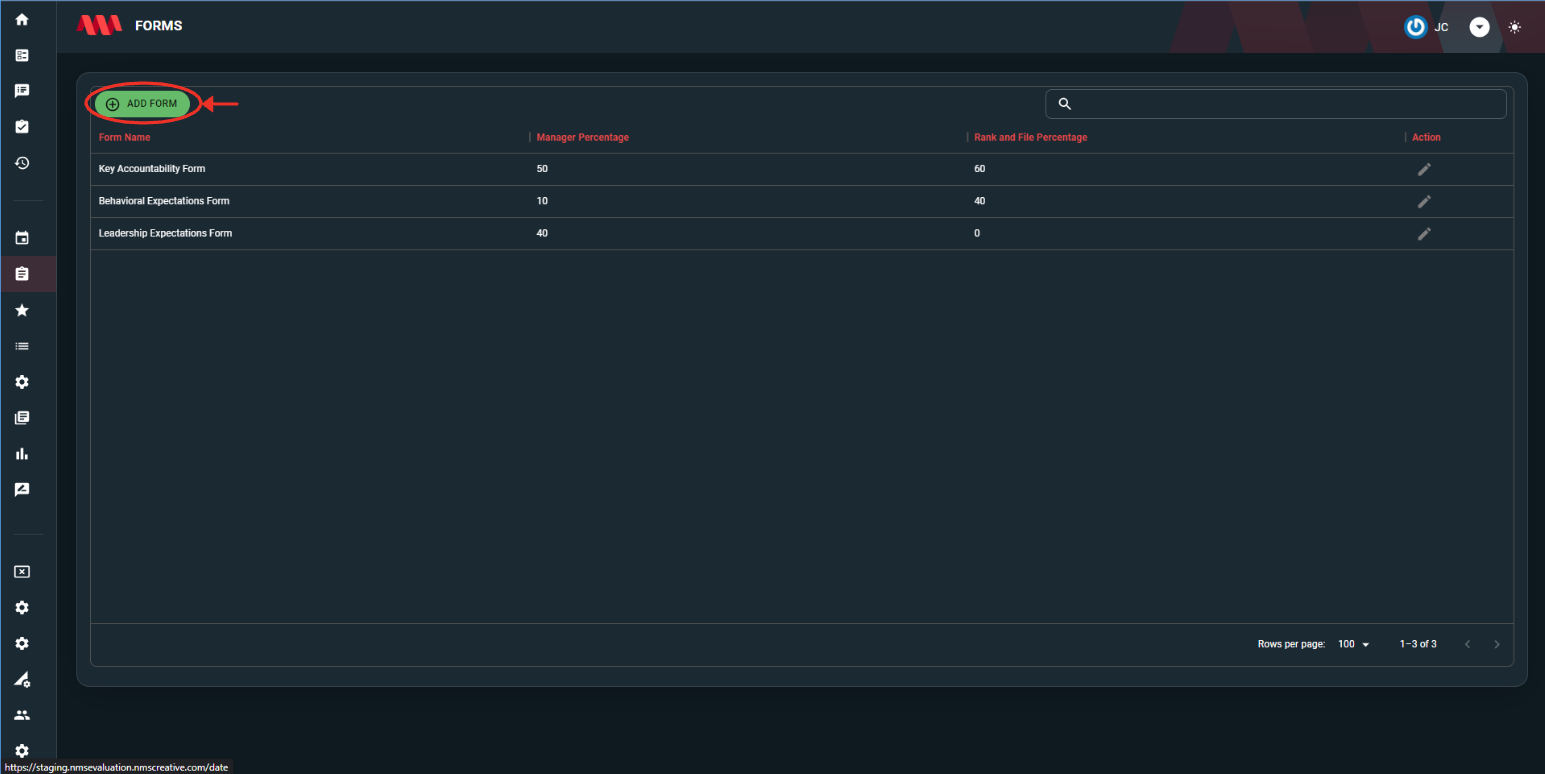
- The Add Form button is to create a form to be use as a category for the evaluation. Please see the image below.
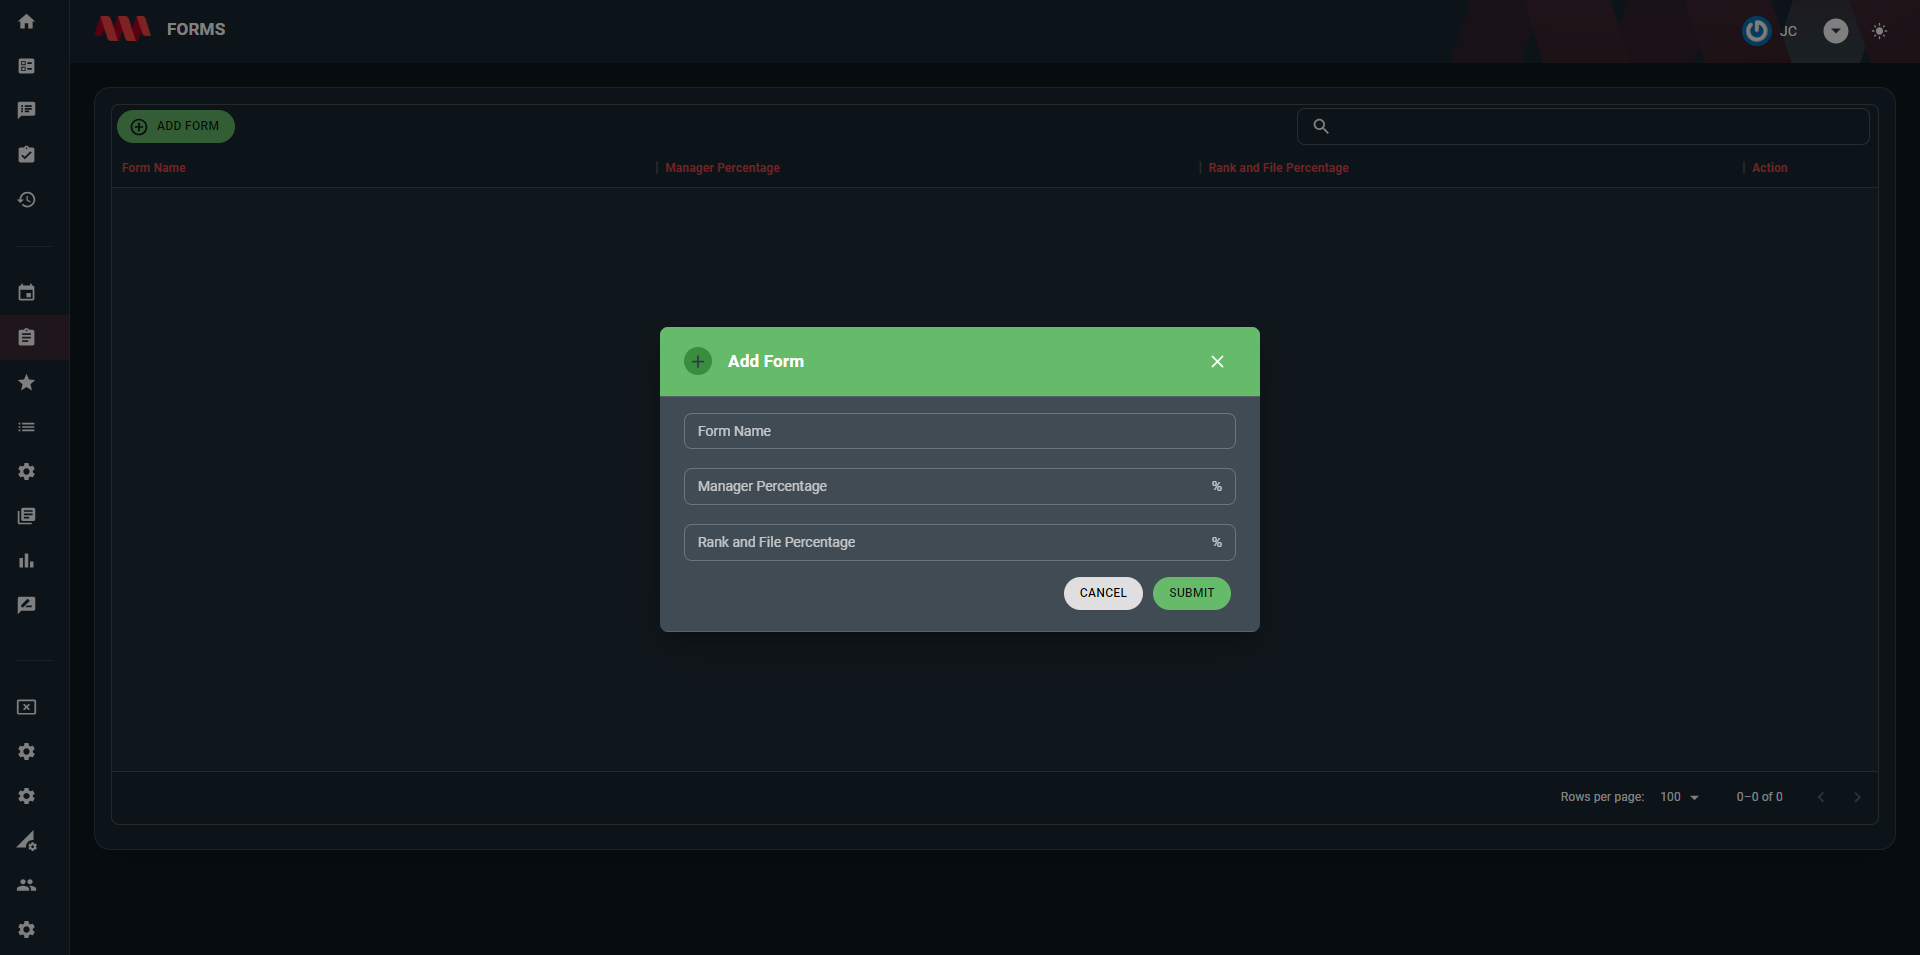
- After clicking the button, a dialog box will appear, displaying the following fields:
Form name - In this field, set the name/title of the form that will be use as a category for the evaluation.
Manager Percentage - In this field, specify the percentage weight or importance of the form that will be created for the manager in the evaluation process.
Rank and File Percentage: In this field, indicate the percentage weight or importance of the form that will be created for the rank and file employees in the evaluation process. - Please see the image below.


Accountabilities and Expectations
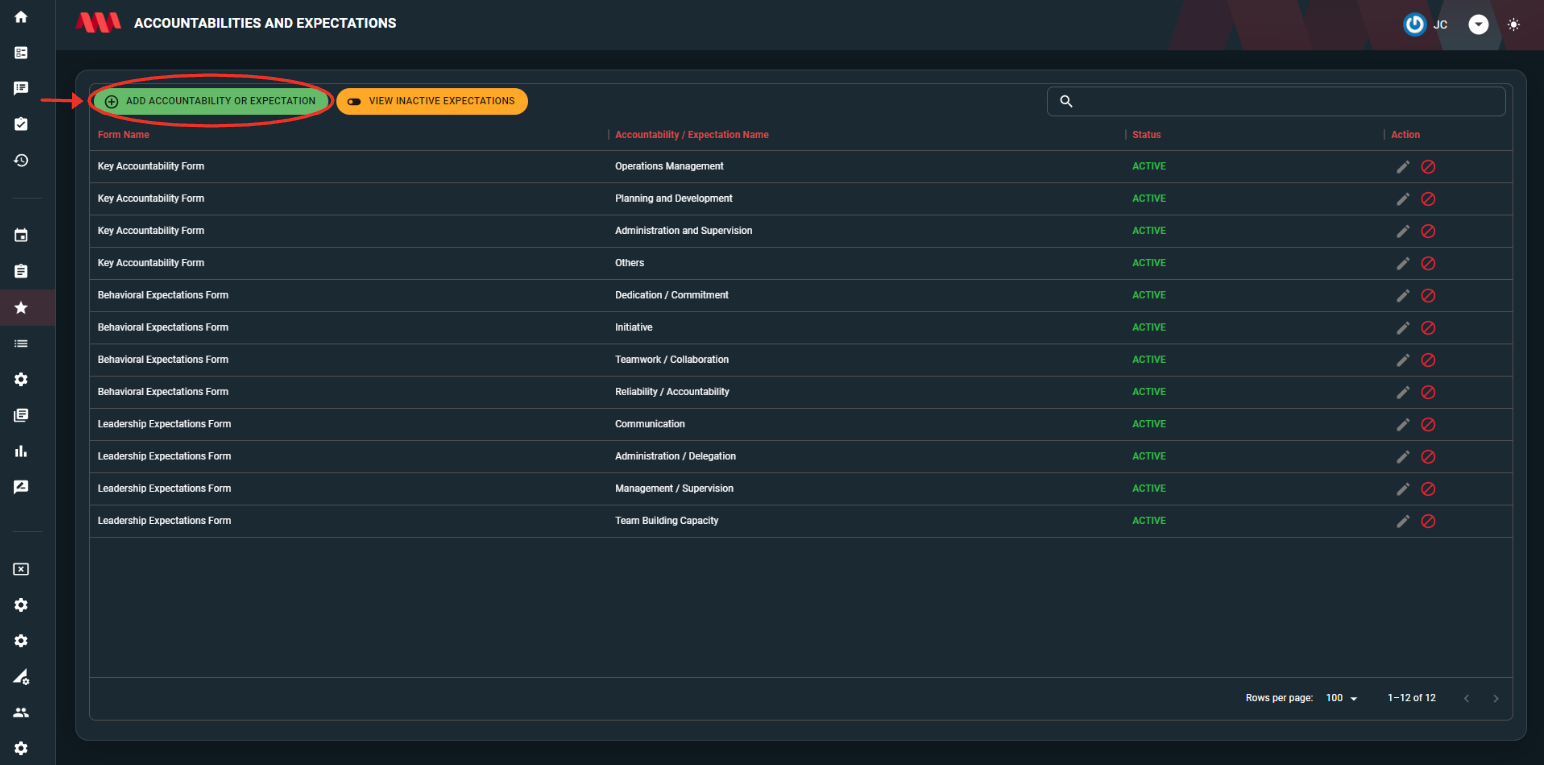
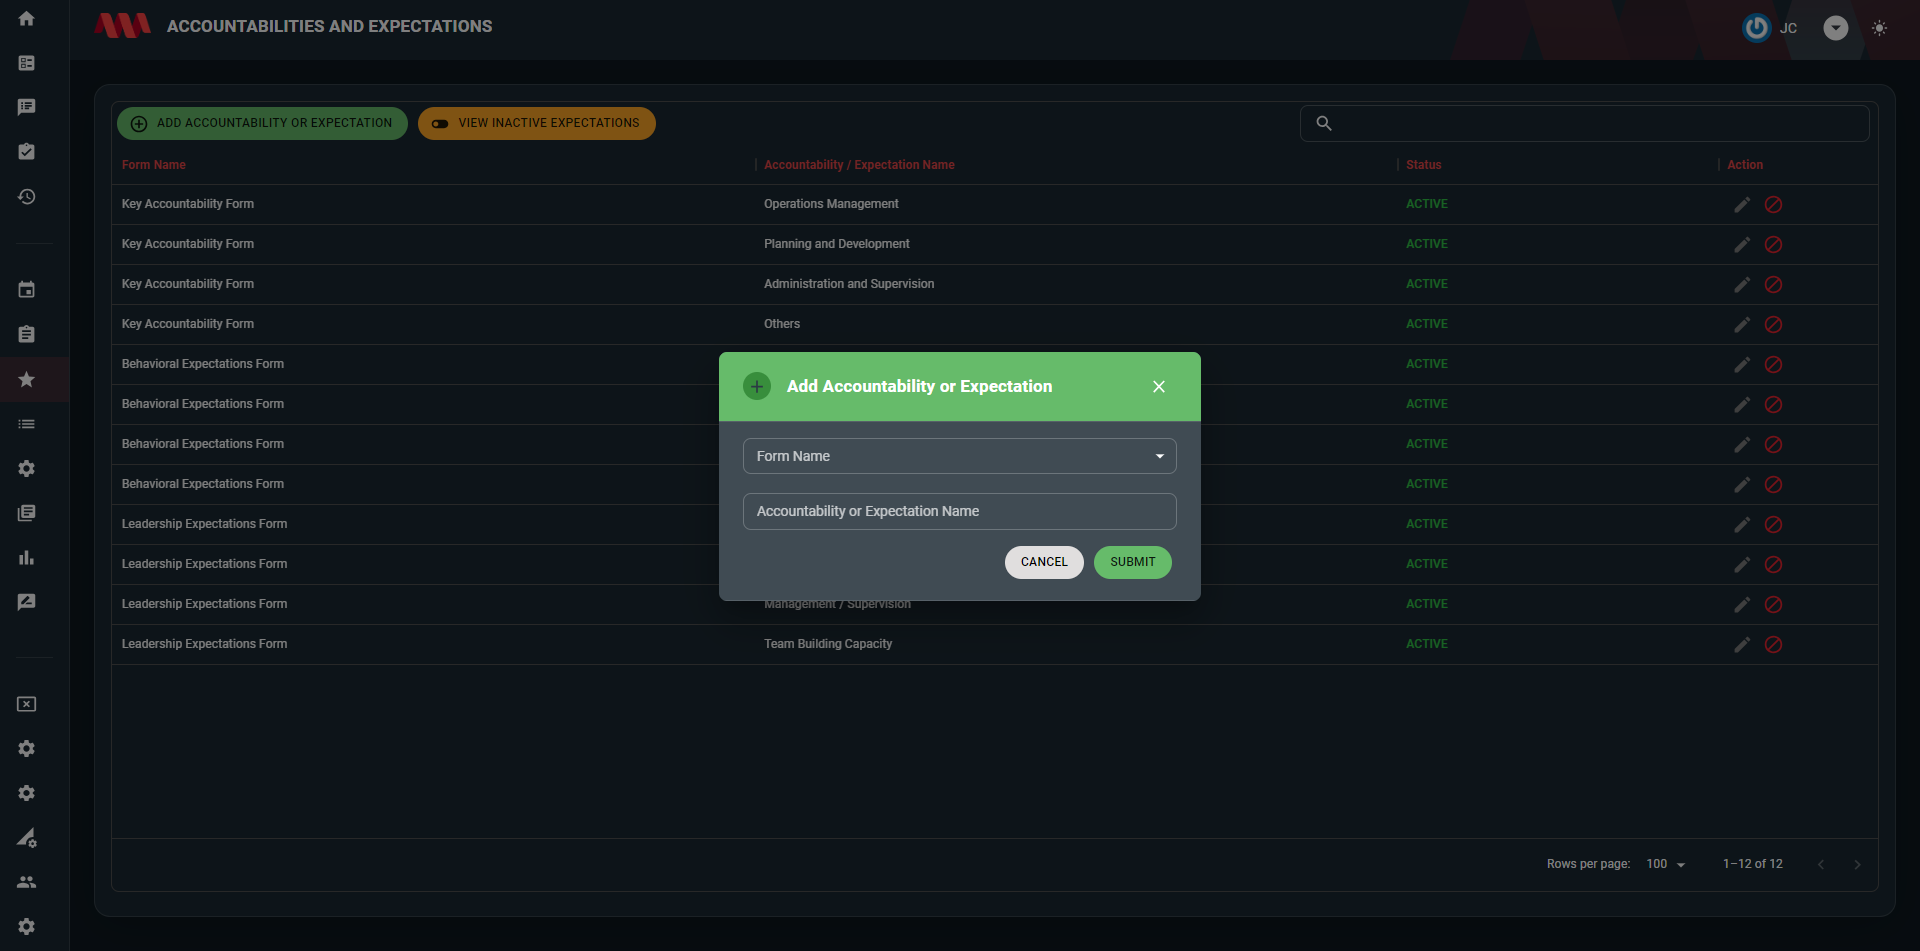
- The Add Accountability or Expectation button is to create a accountability or expectation under the selected form to be use as a subcategory for the evaluation. Please see the image below.

- After clicking the button, a dialog box will appear, displaying the following fields:
Form name - In this field, select the specific form from the list of forms that have previously created.
Manager Percentage - In this field, create a specific accountability or expectation to add for the selected form. This could include tasks, goals, targets, or any other performance-related expectations. - Please see the image below.

- In the Action column, edit or deactivate are provided. Please see the image below.
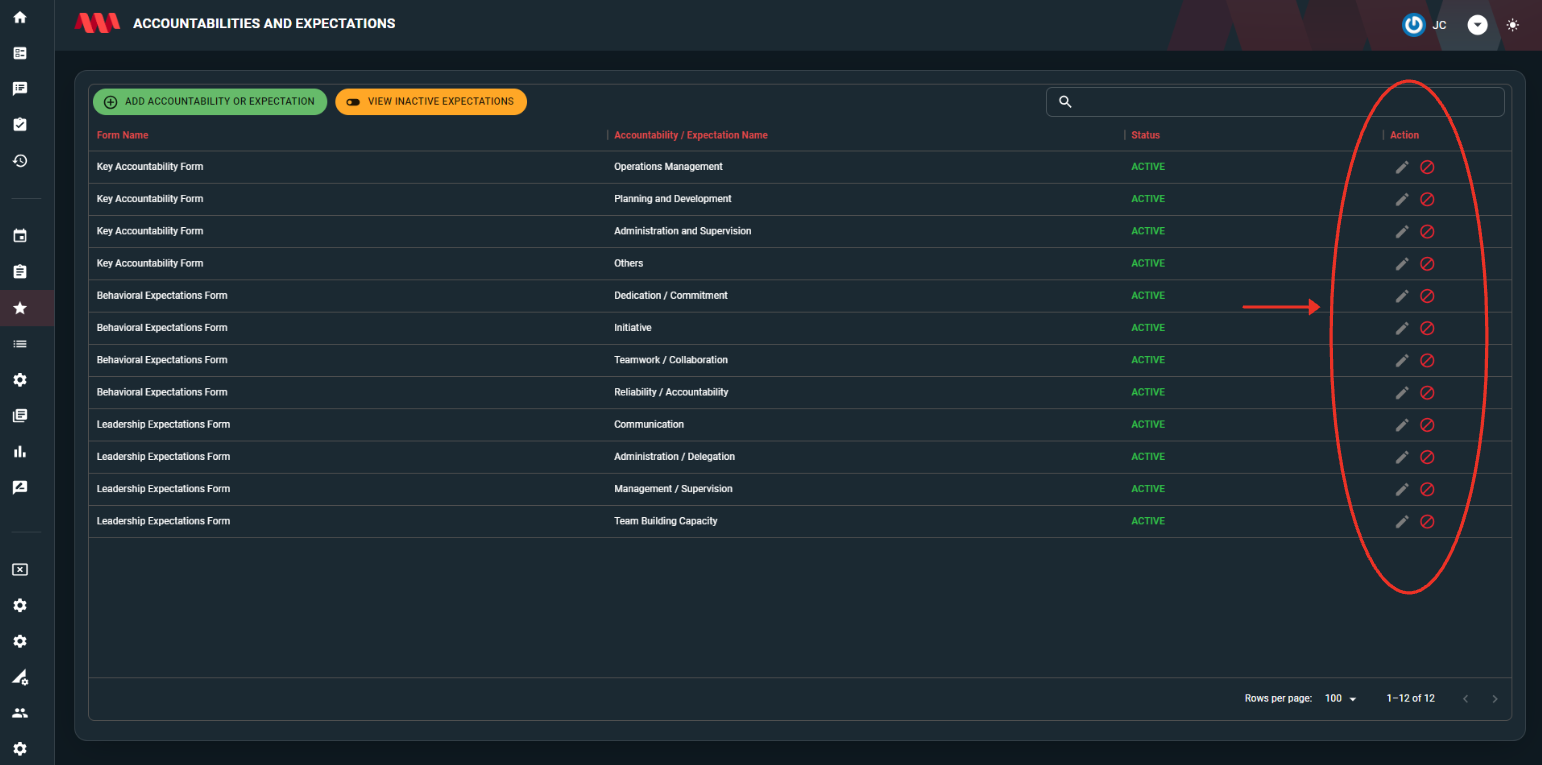
Edit - to modify the details or content of the selected accountability or expectation.
Deactivate - removes the selected accountability or expectation from active use. - The View Inactive Expectations button is to see all the deactivated accountabilities or expectations. Please see the image below.

The activate icon will reactivate and restore its active status. This means that the accountability or expectation will once again be considered and included in the evaluation process.


Specifics
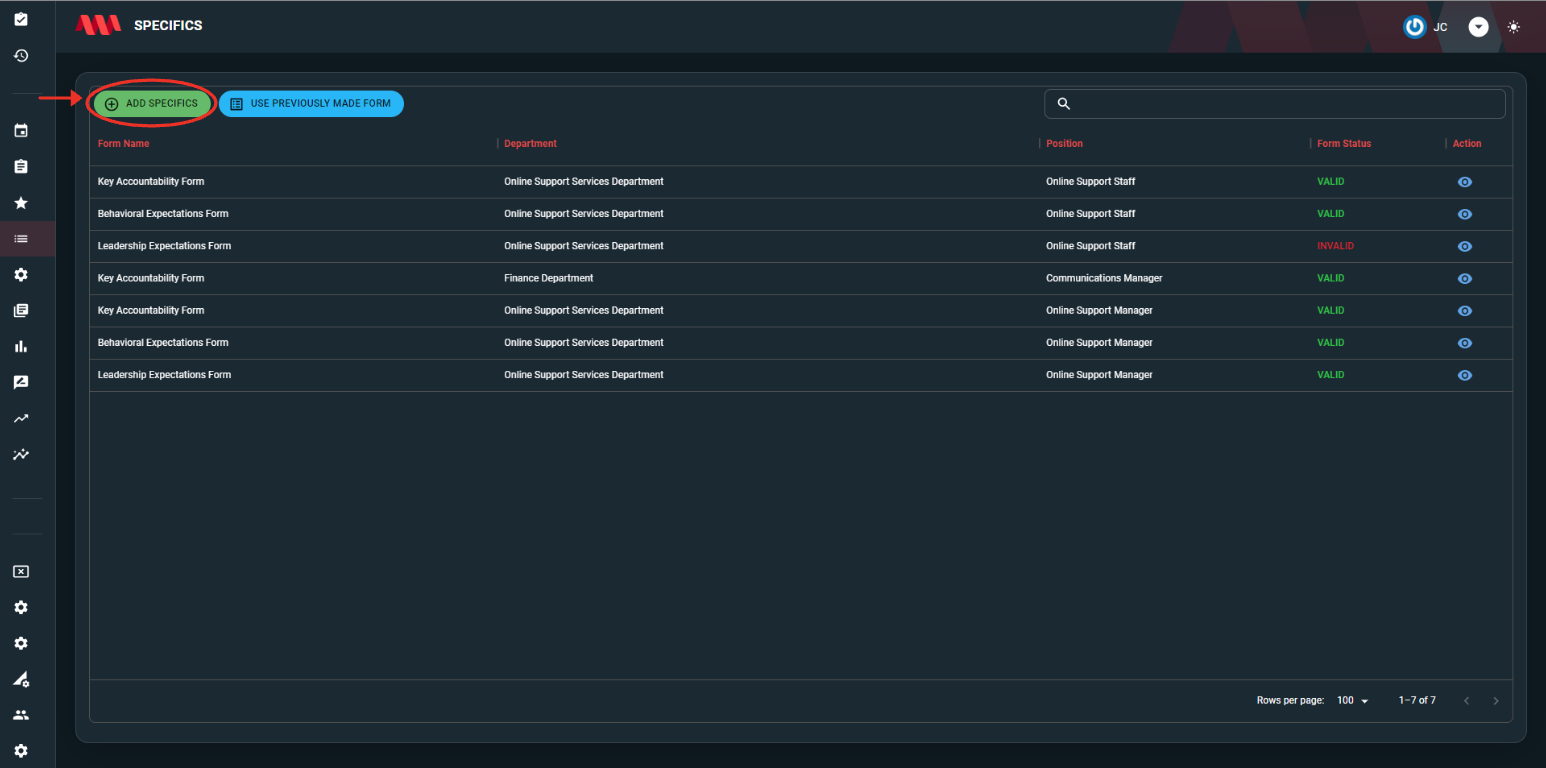
- The Add Specifics button is to add more detailed information about the specific tasks and responsibilities associated with the evaluation. This feature helps provide a comprehensive understanding of the expectations for the evaluation process.

- After clicking the button, a dialog box will appear, displaying the following fields:
Form name - In this field, select the specific form from the list of forms that have been previously created.
Select Department - In this field, choose the relevant department to which the evaluated individual belongs.
Immediate Supervisor - In this field, specify the position of the immediate supervisor of the evaluated individual.
Job Position - In this field, indicate the job position of the evaluated individual.
Evaluatee Job Position Details - In this field, provide additional details about the job position.
Accountability/Expectation - In this field, choose a specific accountability or expectation the have previously created.
Specific - In this field, provide more detailed information about the accountability or expectation. This allows
Percentage - In this field, you can assign a percentage weight or importance to the specific that will be created. This indicates the impact of this particular specific in the overall evaluation process.
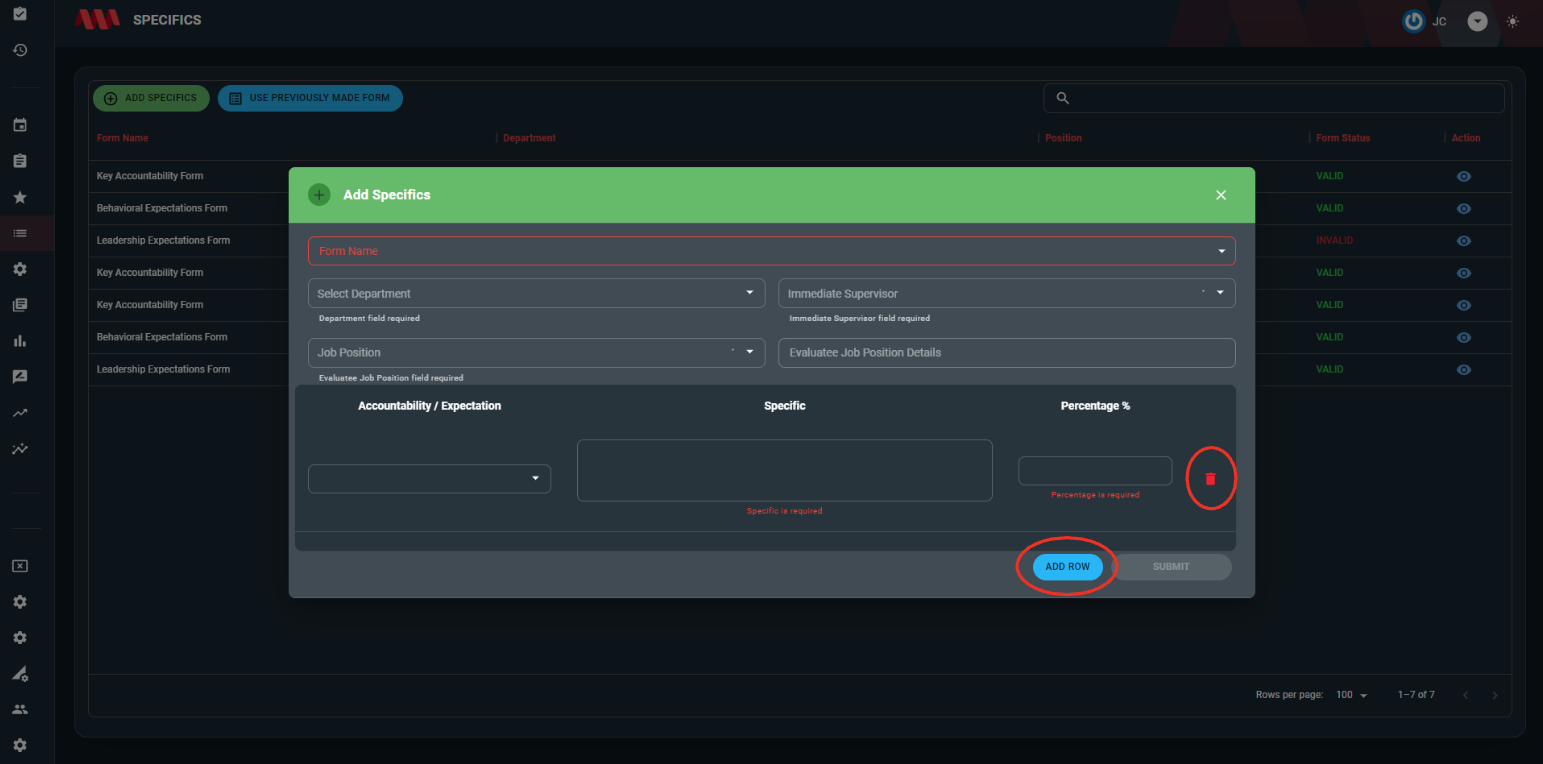
- The Delete icon is to delete the selected row.
- The Add Row button is to add a new row in the list.
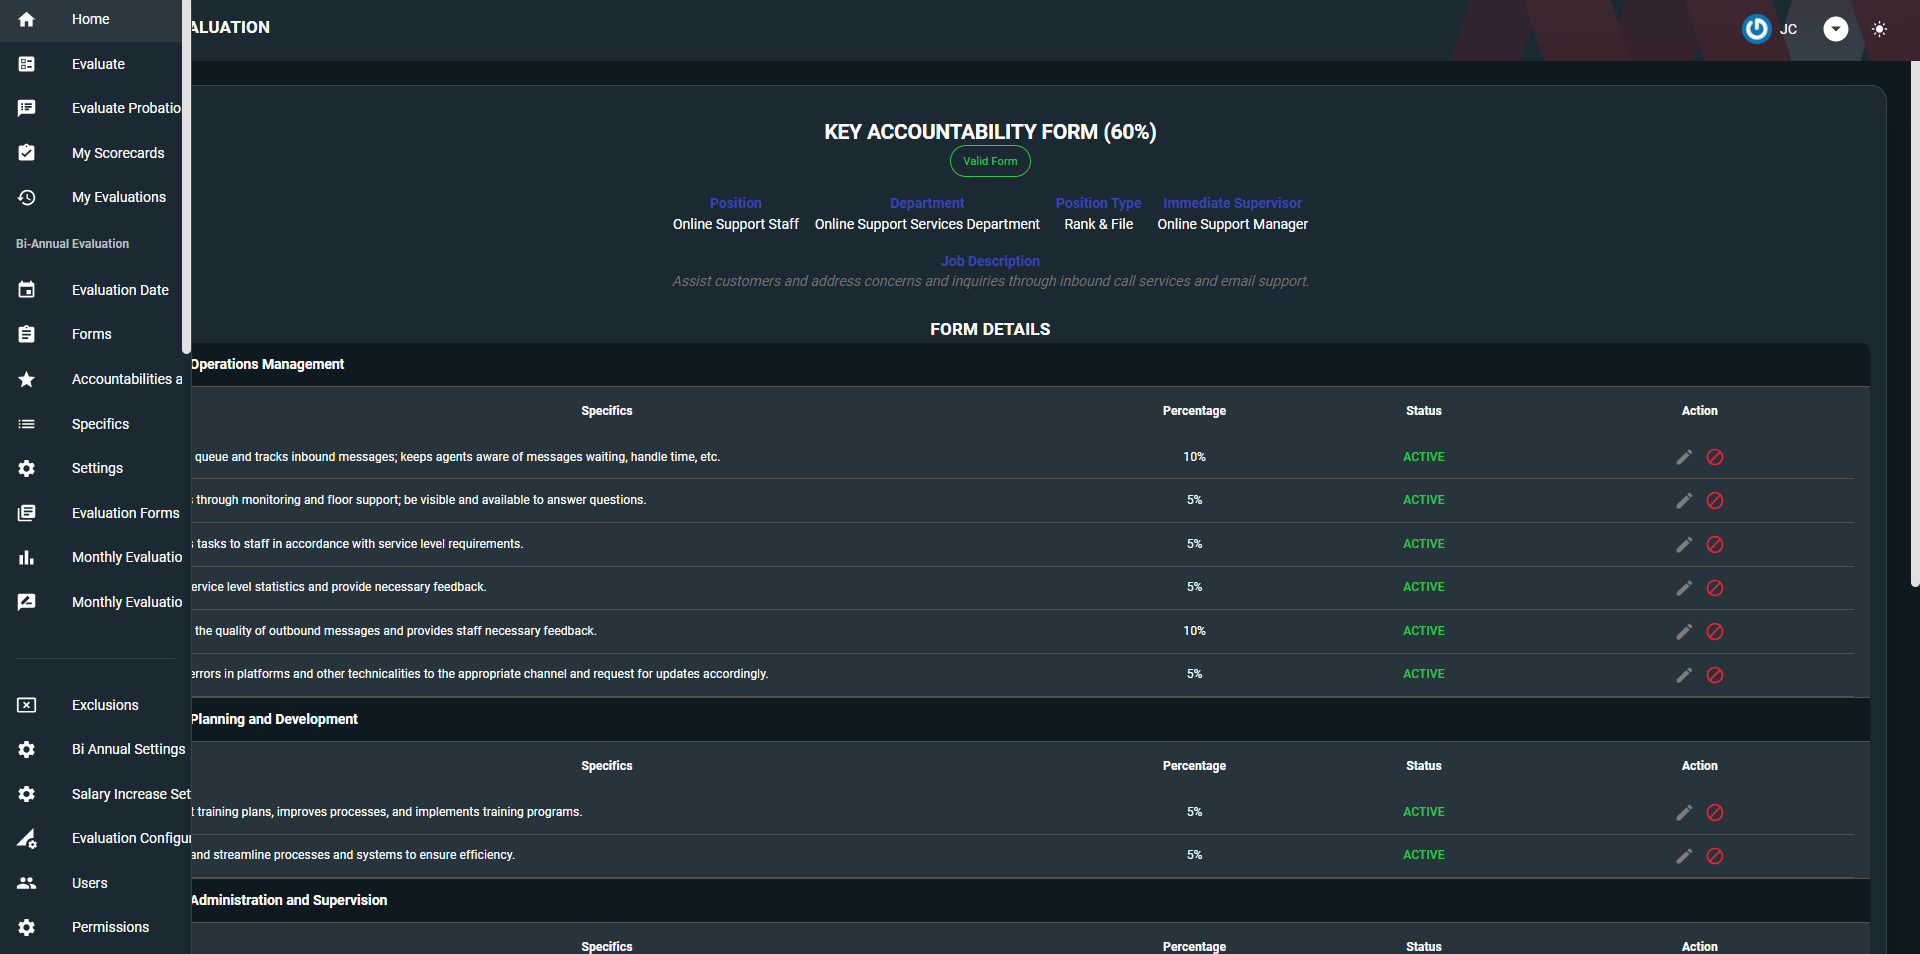
- The View icon, under the action column, provides the ability to access and review all the data associated with the selected form. Click the View icon to examine the complete set of information and details of the specific form.
-
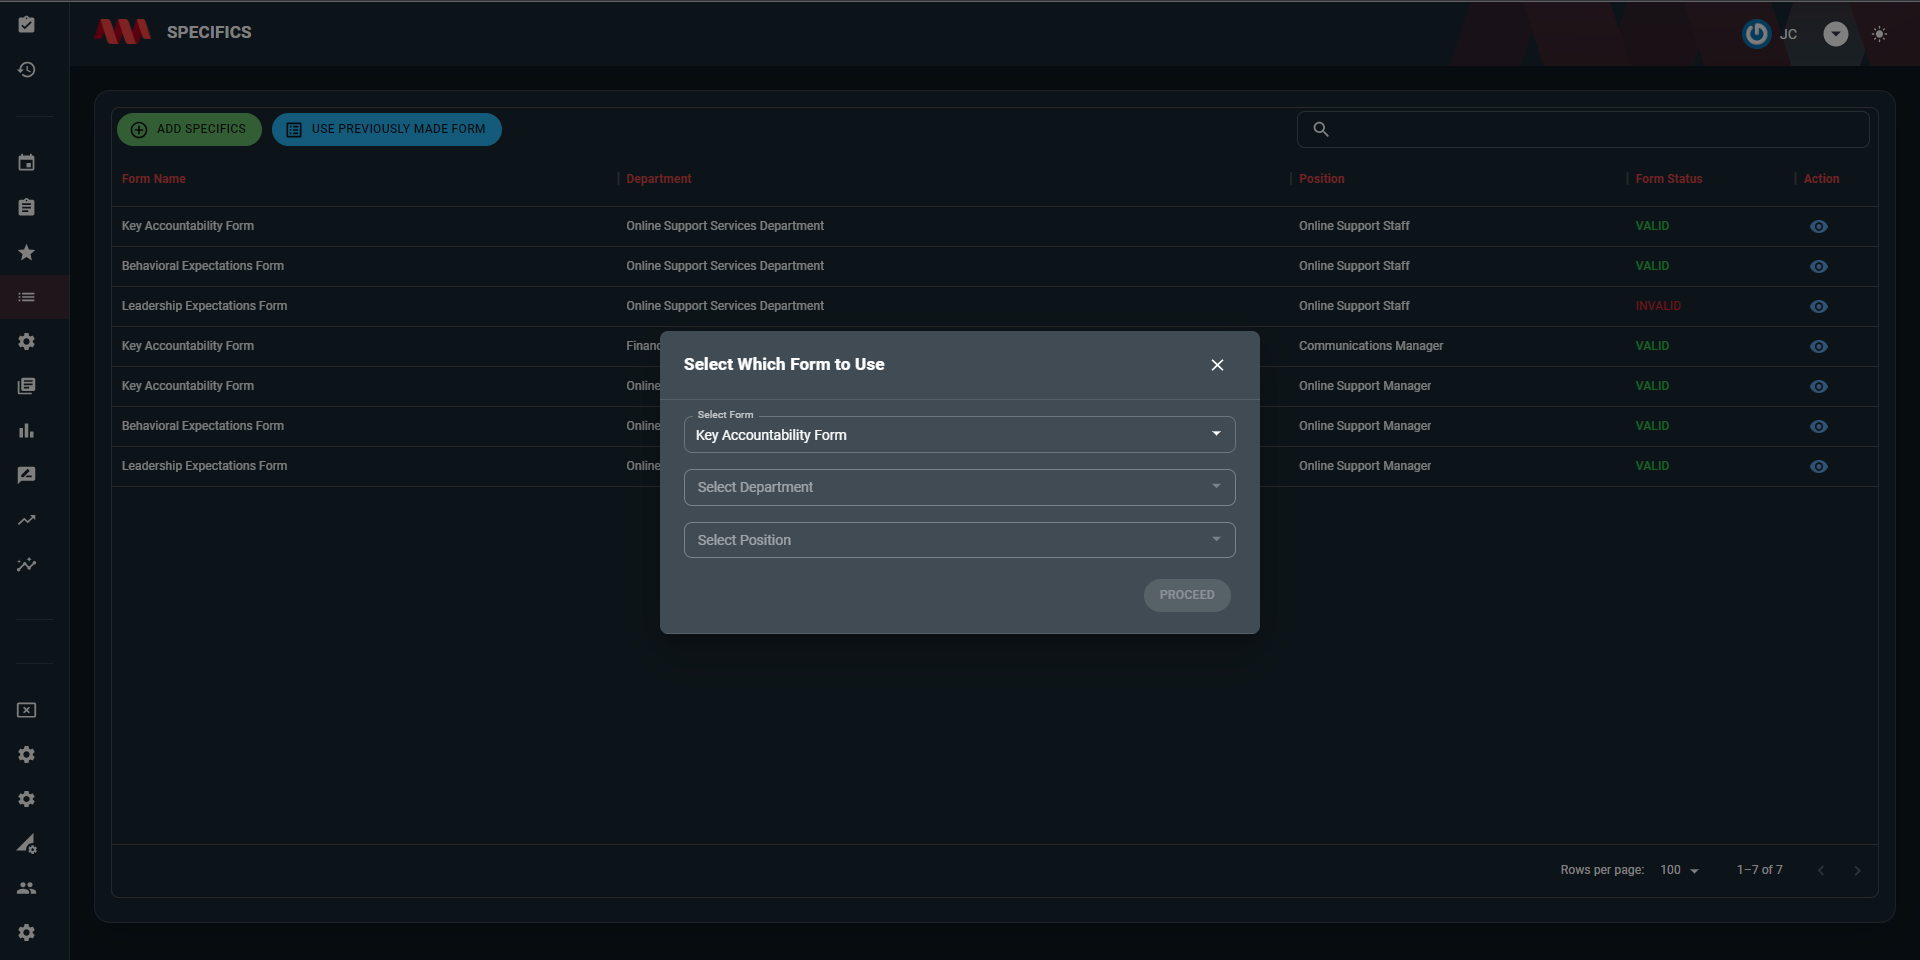
The Use Previously Made button is to utilize a form that they have previously created. Click the button to access and utilize the specific form they have previously saved or generated within the application.
When the button is clicked, a list or menu will be displayed, presenting the previously created forms.


Settings
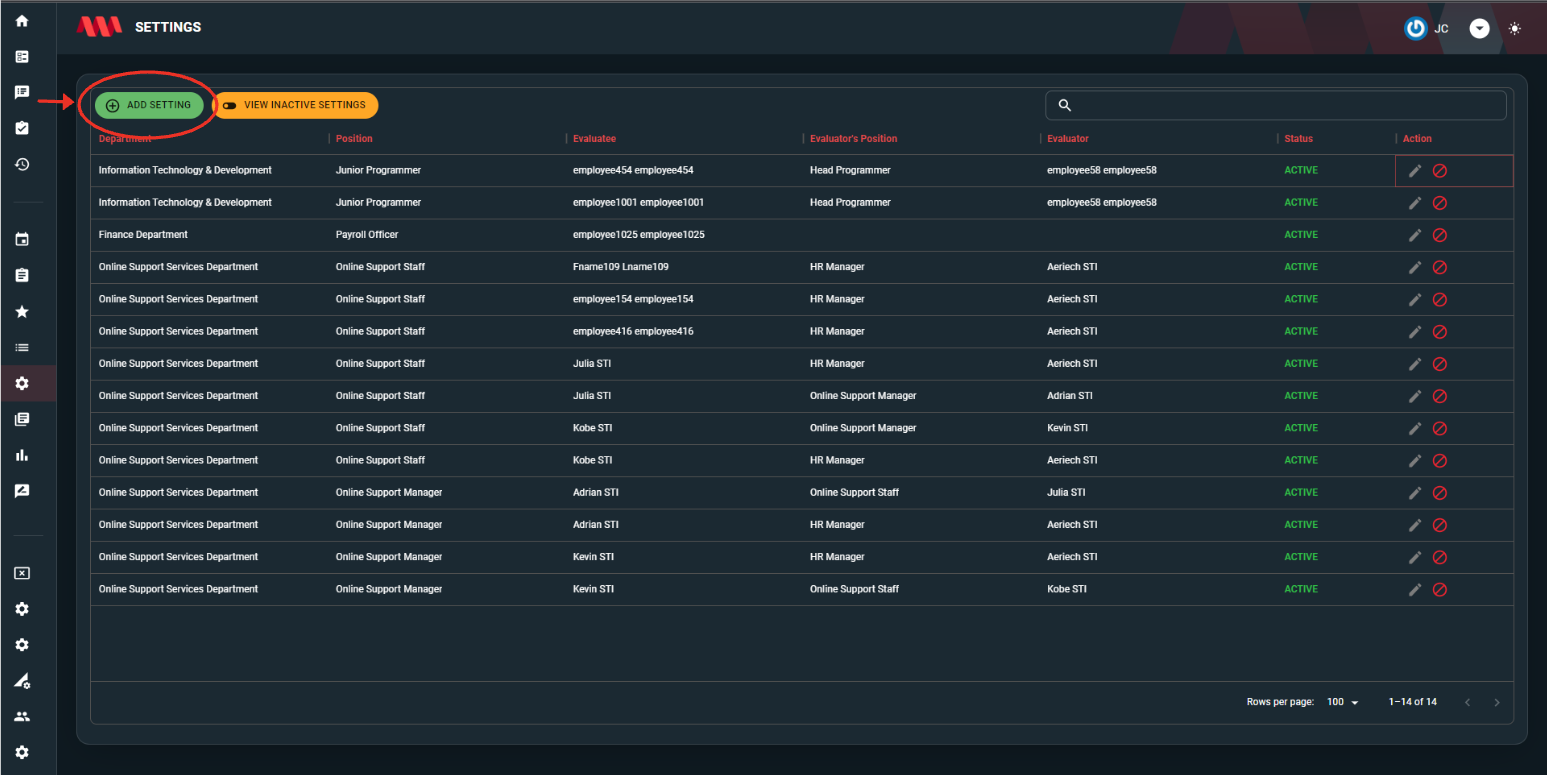
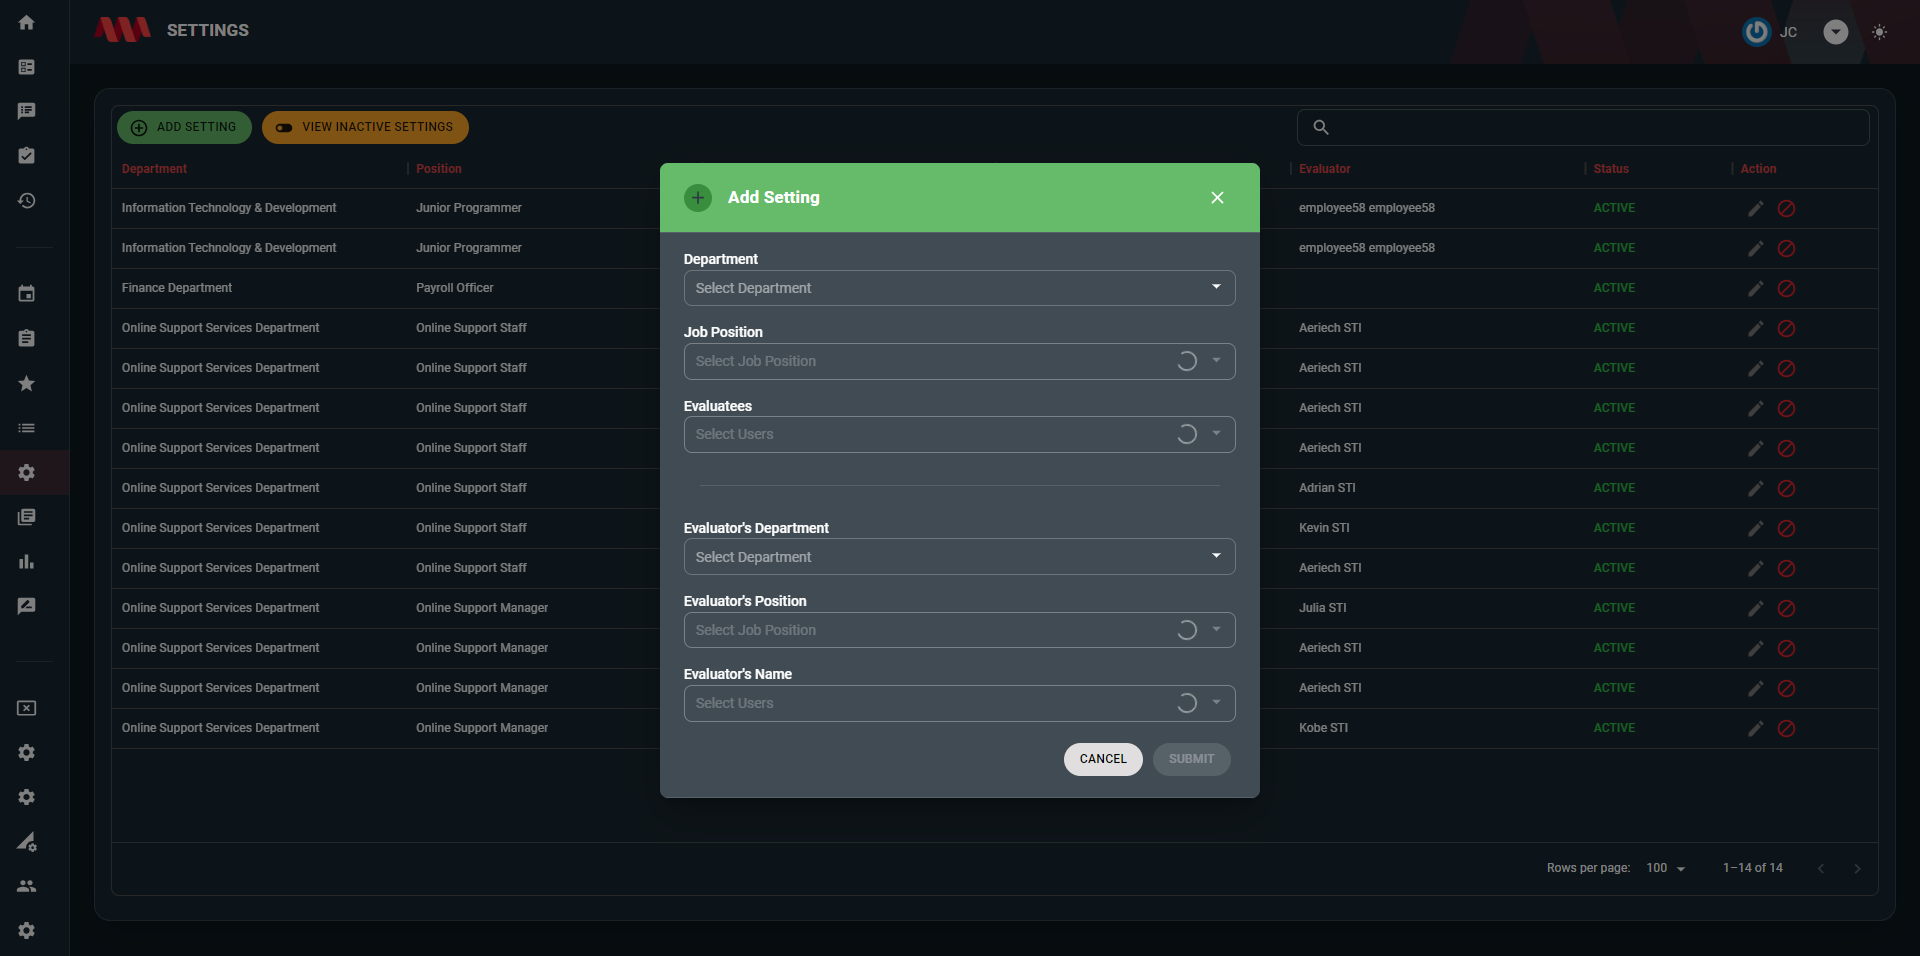
- The Add setting button is to create a evaluation form and specify the evaluator and evaluatee and their necessary details.
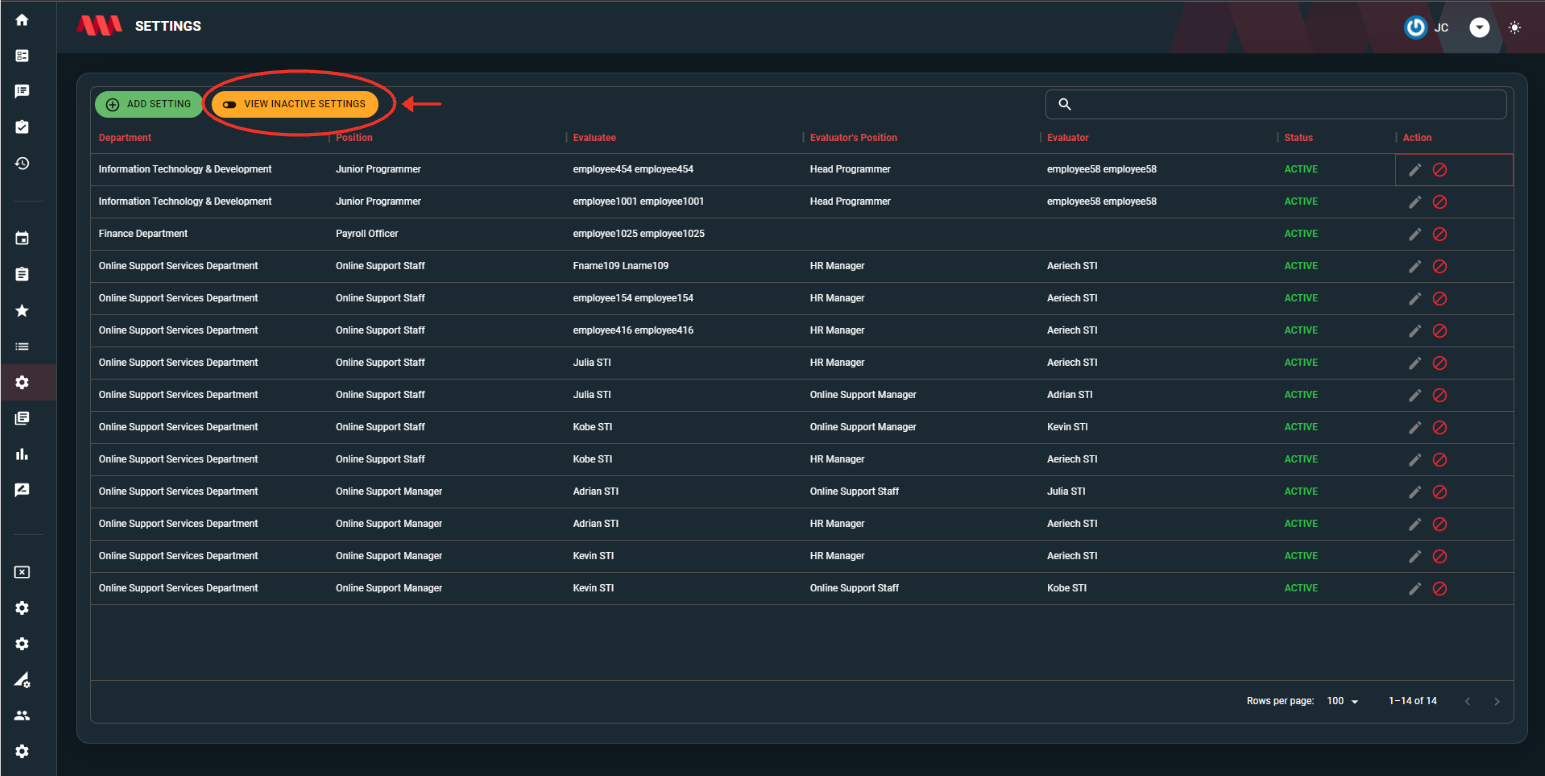
- The View Inactive Settings button is to see all the deactivated accountabilities or expectations.
Edit - to modify the details or content of the selected setting.
Deactivate - removes the selected setting from active use.
The activate icon will reactivate and restore its active status. This means that the setting will once again be considered and included in the evaluation process.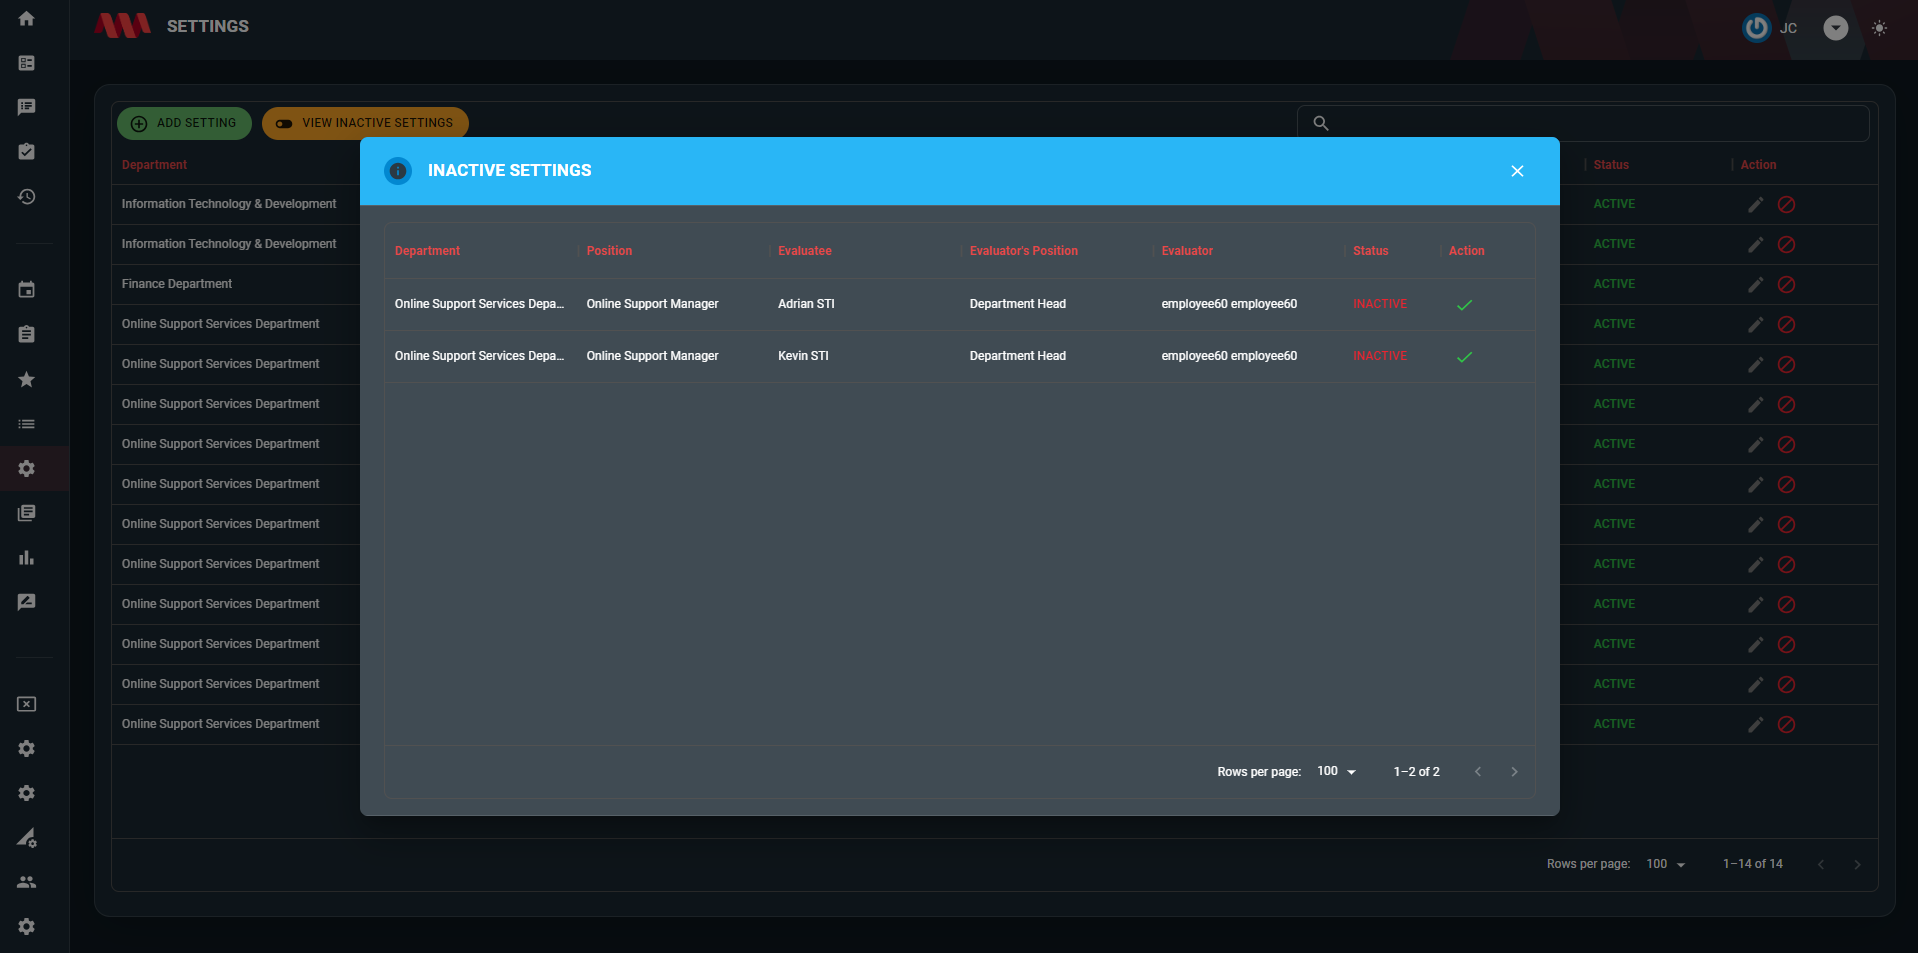


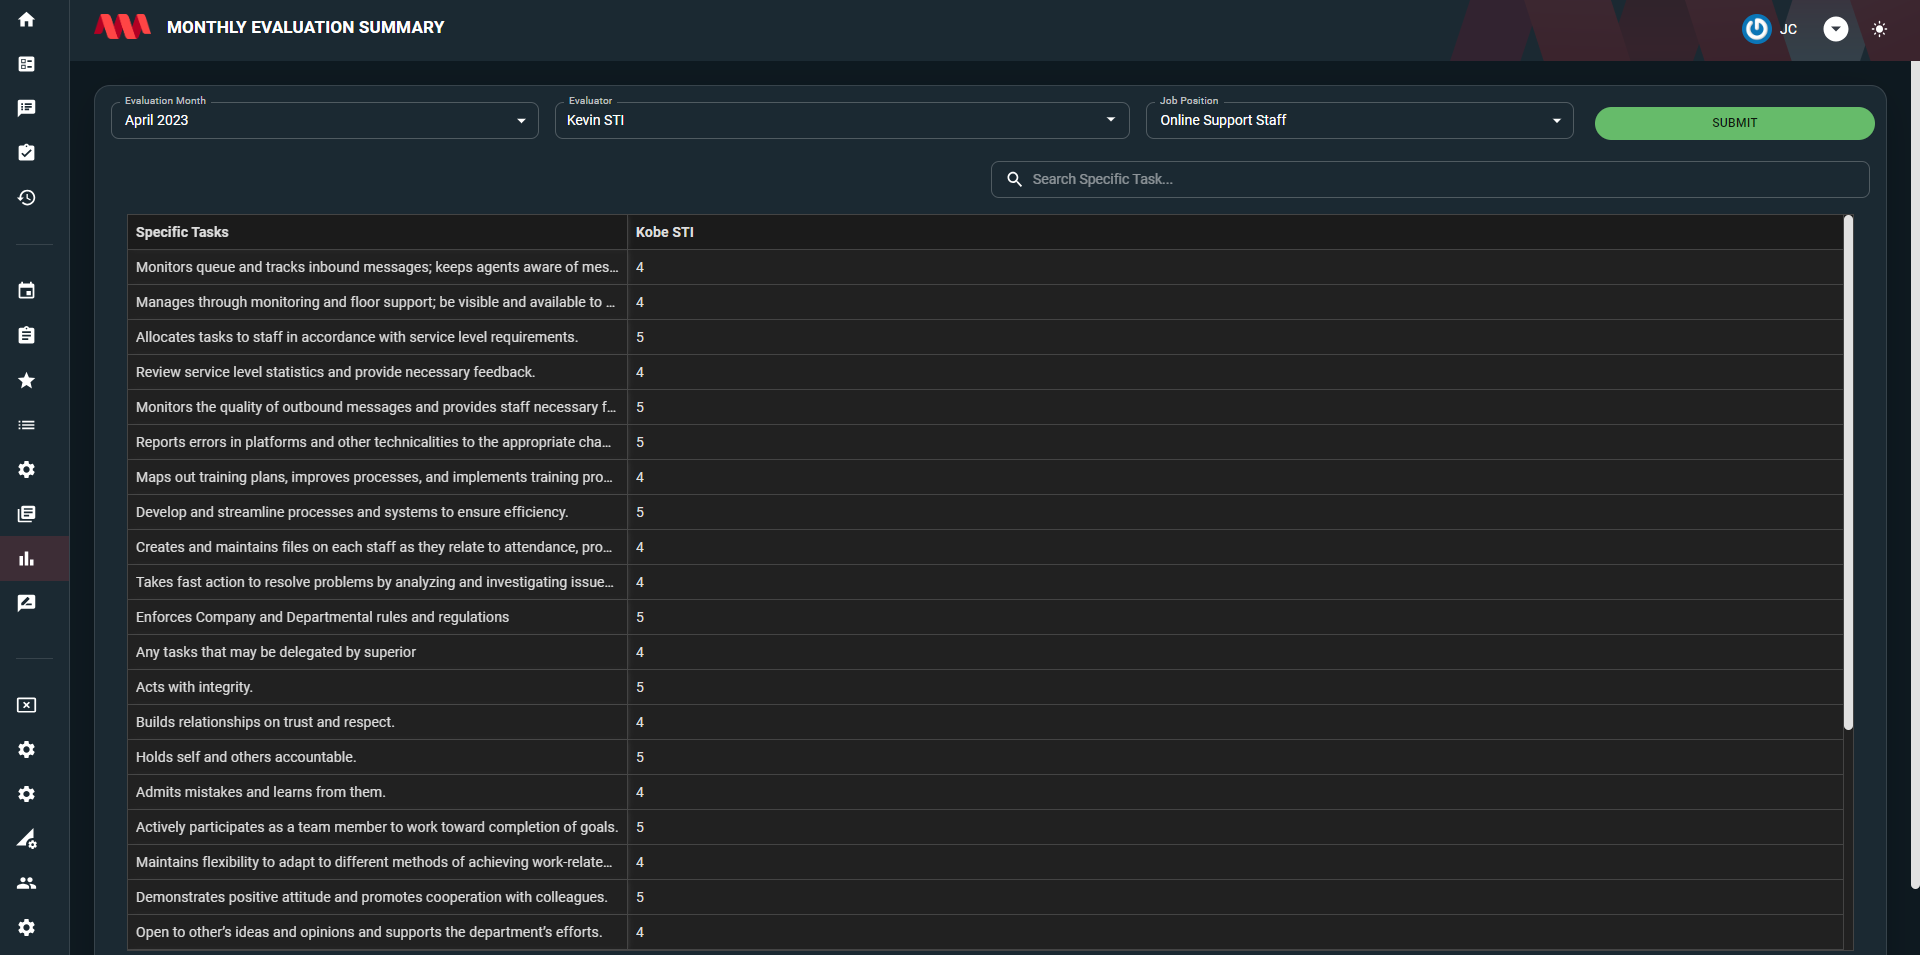
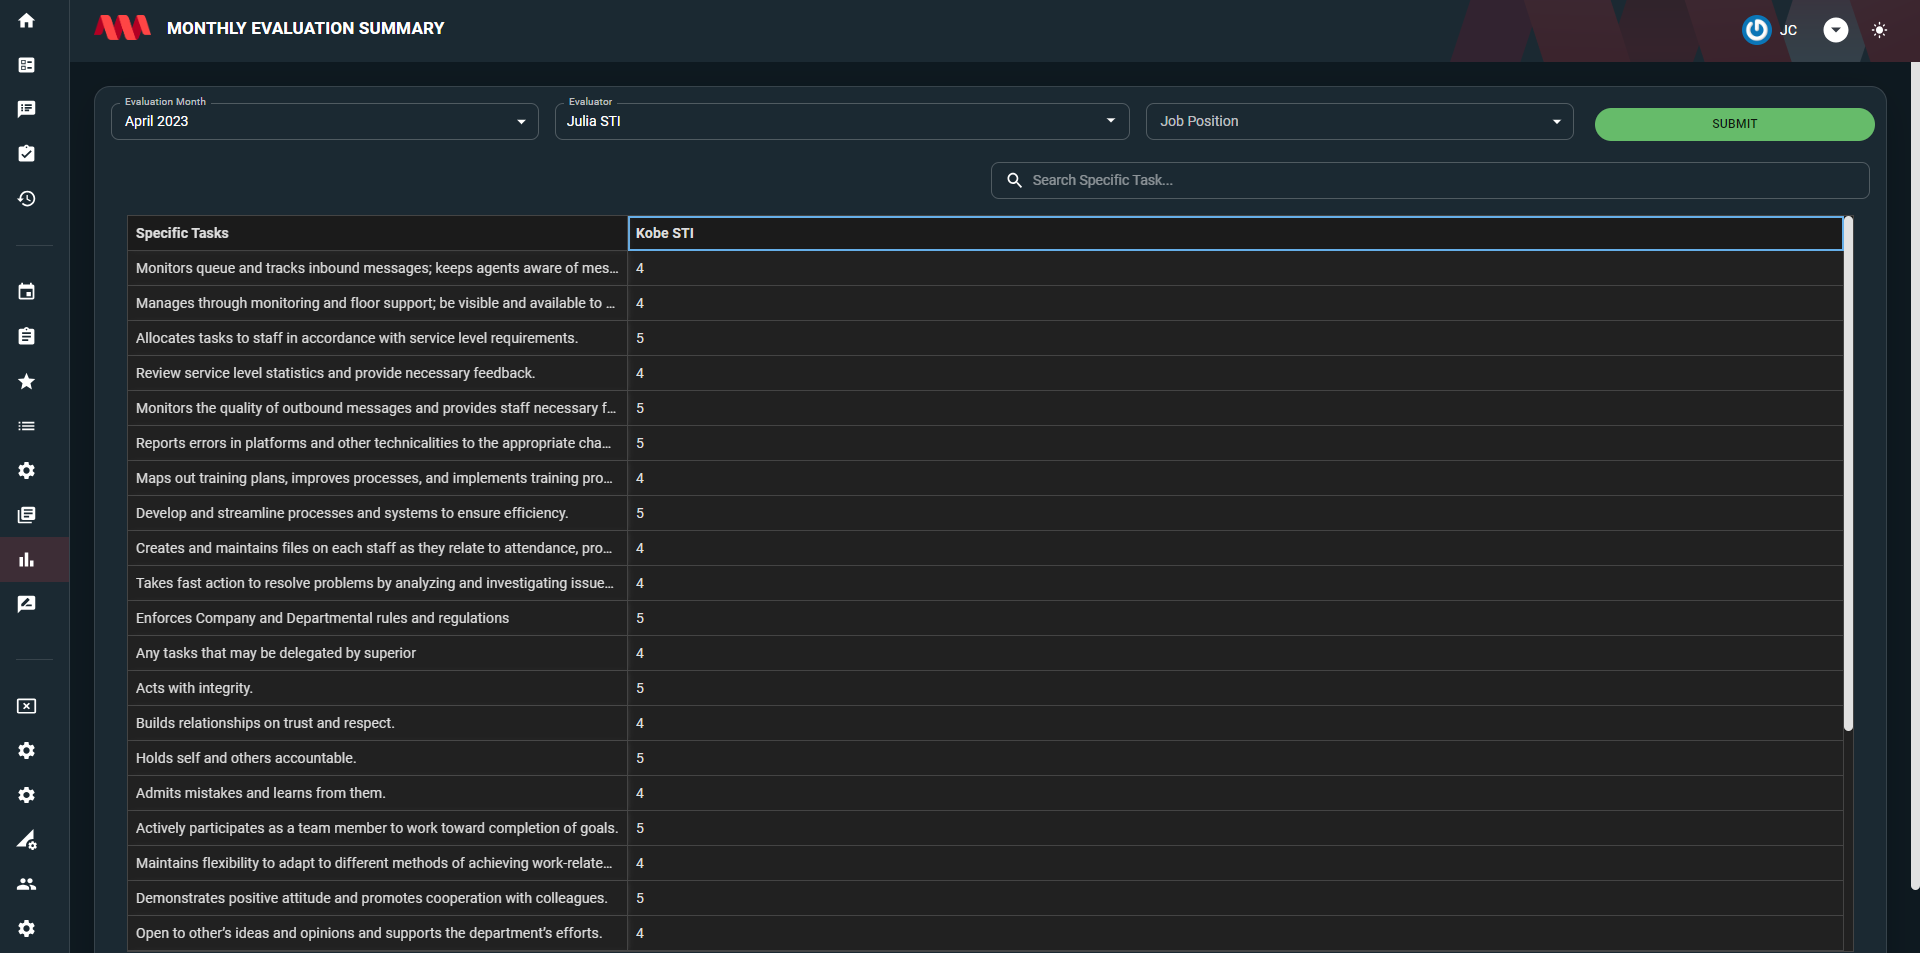
Monthly Evaluation Summary
- Fill in the required fields to generate the desired information.

Evaluation Month: Enter the specific month for which the evaluation conducted.
Evaluator: Specify the name of the evaluator responsible for conducting the evaluation.
Job Position: Indicate the job position of the evaluator.
- By providing the necessary information in these fields, the Evaluation Application will generate the desired information in the table related to evaluations conducted during a specific month, assigned to a particular evaluator, and its specific job position.